
Crispy Air Fryer Panko Chicken Thighs: An Easy Recipe from My Kitchen to Yours!
Hello, my dears! Amira here, and I’m absolutely thrilled to share one of my family’s most cherished recipes with you: Crispy Air Fryer Panko Chicken Thighs. This isn’t just a recipe; it’s a warm hug on a plate, a simple and flavorful way to bring joy to your dinner table. From my kitchen to yours, let’s create something truly special!
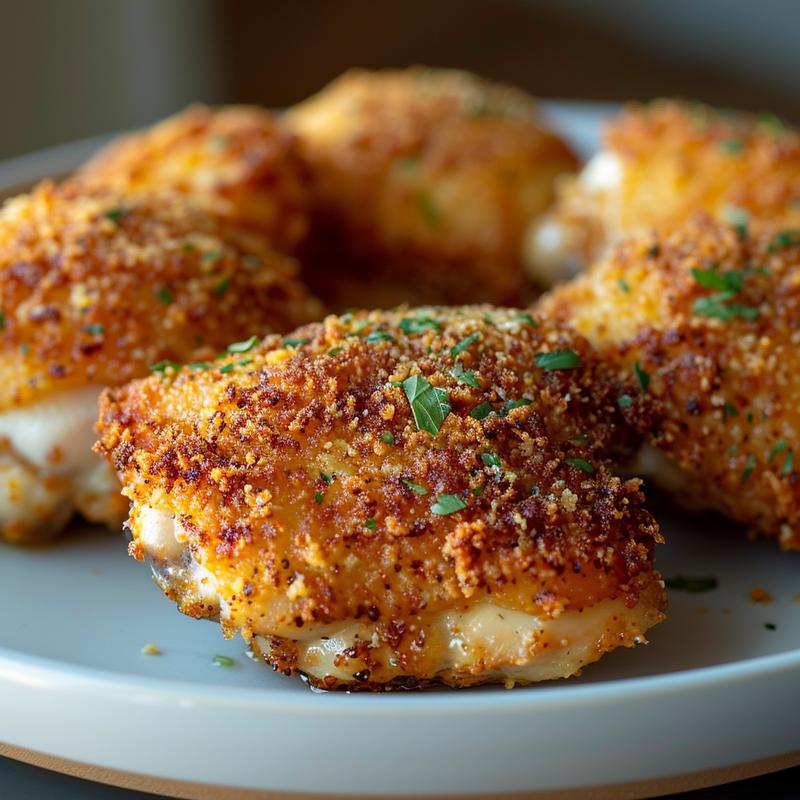
There’s something so comforting about the satisfying crunch of panko breadcrumbs paired with juicy, tender chicken. But what if I told you that you could achieve that perfect crispy texture without all the oil and mess of traditional frying? That’s where the air fryer comes in! This recipe transforms ordinary chicken thighs into a culinary masterpiece in under 30 minutes. So, grab your apron, and let’s get cooking with love!
Why You’ll Absolutely Love These Air Fryer Panko Chicken Thighs
Oh, my dears, there are so many reasons to adore this recipe! It’s a surefire way to make even the pickiest eaters happy. Here’s why I think you’ll fall head over heels for these crispy delights:
- Quick and Easy: Ready in under 30 minutes – perfect for busy weeknights!
- Crispy Perfection: The air fryer creates an unbelievably crispy coating without the need for deep frying.
- Healthier Option: Less oil means a healthier, guilt-free indulgence.
- Simple Ingredients: You probably already have most of the ingredients in your pantry.
- Kid-Friendly: Even the little ones will gobble these up!
- Versatile: Serve them as a main course, in sandwiches, or even on salads.
The Magic Behind the Ingredients
Let’s talk about what makes this recipe so special. Each ingredient plays a crucial role in creating the perfect balance of flavor and texture.
- 4 boneless, skinless chicken thighs: The star of the show! Thighs are naturally more flavorful and stay juicier than chicken breasts, making them ideal for air frying.
- 1 cup panko breadcrumbs: These Japanese breadcrumbs are the secret to that incredible crispy coating. They’re lighter and flakier than regular breadcrumbs, resulting in a superior crunch.
- 2 large eggs, beaten: These act as the binder, helping the panko adhere to the chicken.
- ½ cup all-purpose flour: This provides a base layer for the coating, ensuring even coverage and extra crispiness.
- 1 teaspoon garlic powder: Adds a lovely savory note that complements the chicken beautifully.
- 1 teaspoon paprika (smoked or sweet): A touch of paprika adds color and a hint of smokiness (if using smoked paprika) or sweetness (if using sweet paprika).
- ½ teaspoon salt: Enhances all the flavors and brings everything together.
- ¼ teaspoon black pepper: A little pepper adds a subtle kick.
- Olive oil spray (for air fryer): This helps the chicken crisp up without sticking to the air fryer basket.
You may want to add a squeeze of fresh lemon juice after cooking for an extra zing!
Step-by-Step: Crafting Crispy Chicken Perfection
Now, let’s get down to the nitty-gritty! Follow these simple steps, and you’ll be enjoying crispy, golden chicken thighs in no time.
- Step 1: Prep the Chicken: Pat the chicken thighs dry with paper towels. This is crucial! Removing excess moisture helps the coating stick better and prevents the chicken from steaming instead of crisping up in the air fryer.
- Step 2: Season the Flour: In a shallow bowl, combine the flour, garlic powder, paprika, salt, and pepper. This seasoned flour will add an extra layer of flavor to the coating. Don’t skip this step; it makes a world of difference!
- Step 3: Dredge the Chicken: Set up a dredging station with three bowls: one with the seasoned flour, one with the beaten eggs, and one with panko breadcrumbs. First, coat each chicken thigh in the flour, then dip into the egg, and finally press into the panko until fully coated. Make sure every inch is covered for maximum crispiness!
- Step 4: Preheat and Prep the Air Fryer: Preheat your air fryer to 400°F (200°C) for 3–5 minutes. This ensures even cooking and helps the chicken crisp up beautifully. Lightly spray the air fryer basket with olive oil to prevent sticking.
- Step 5: Air Fry the Chicken: Place the chicken thighs in a single layer in the air fryer basket. Don’t overcrowd the basket; you may need to cook in batches. Lightly spray the tops with olive oil spray. Cook at 400°F (200°C) for 10 minutes, flip, spray again, and cook for another 8–10 minutes or until golden and crispy. The internal temperature should reach 165°F (74°C). Use a meat thermometer to be sure!
- Step 6: Rest and Serve: Let the chicken rest for a couple of minutes before slicing or serving. This helps retain the juices and keeps the crust crisp.
Amira’s Pro Tips for Air Fryer Success
Over the years, I’ve learned a few tricks to ensure perfect air fryer results every single time. Here are my top tips for achieving chicken thigh perfection:
- Don’t Overcrowd the Basket: Cook in batches to ensure even cooking and maximum crispiness. Overcrowding can lead to steaming instead of frying.
- Pat the Chicken Dry: Removing excess moisture is key to a crispy coating.
- Use Panko Breadcrumbs: They provide the best texture and crunch compared to regular breadcrumbs.
- Spray with Oil: Lightly spraying the chicken with olive oil helps it crisp up beautifully.
- Check the Internal Temperature: Always use a meat thermometer to ensure the chicken is cooked to a safe internal temperature of 165°F (74°C).
Common Mistakes to Avoid (and How to Fix Them!)
Even the best cooks make mistakes sometimes! Here are a few common pitfalls to watch out for when making air fryer panko chicken thighs, along with my tried-and-true solutions:
- Soggy Chicken: Make sure to pat the chicken dry before coating it. Also, avoid overcrowding the air fryer basket.
- Uneven Cooking: Ensure the chicken thighs are in a single layer in the air fryer basket. Flip them halfway through cooking for even browning.
- Burnt Coating: If the coating is browning too quickly, reduce the air fryer temperature by 25°F (15°C) and continue cooking until the chicken is cooked through.
- Dry Chicken: Don’t overcook the chicken! Use a meat thermometer to check the internal temperature and remove it from the air fryer as soon as it reaches 165°F (74°C). Letting the chicken rest after cooking also helps retain moisture.
Variations: Putting Your Own Spin on This Classic
One of the things I love most about cooking is the ability to experiment and create something new. Feel free to put your own spin on this recipe! Here are a few variations to get you started:
- Spicy Chicken: Add a pinch of cayenne pepper or a dash of hot sauce to the flour mixture for a spicy kick.
- Italian Chicken: Mix Italian seasoning into the flour and panko breadcrumbs for an Italian-inspired twist.
- Lemon Herb Chicken: Add lemon zest and chopped fresh herbs (such as parsley, thyme, or rosemary) to the panko breadcrumbs for a bright and flavorful variation.
- Parmesan Chicken: Mix grated Parmesan cheese into the panko breadcrumbs for a cheesy, savory delight.
- Chicken Piccata Air Fryer Style: After cooking the chicken, you can easily transform this into a chicken piccata dish. Create a simple lemon butter sauce with white wine, fresh lemon juice, and capers. The sauce is the key to authentic chicken piccata.
Storing and Reheating Your Crispy Creations
If you happen to have any leftovers (which is rare in my house!), here’s how to store and reheat them to maintain that delicious crispy texture:
- Storing: Let the chicken cool completely before storing it in an airtight container in the refrigerator. It will keep for up to 3 days.
- Reheating: For the best results, reheat the chicken in the air fryer at 350°F (175°C) for 5–7 minutes, or until heated through and crispy. You can also reheat it in the oven at 350°F (175°C) for about 10 minutes. Avoid microwaving, as it can make the chicken soggy.
Frequently Asked Questions (FAQ)
I know you might have some questions, so I’ve compiled a list of the most common ones I get asked about this recipe:
- Can I use chicken breasts instead of chicken thighs?: While you can, chicken thighs are more flavorful and stay juicier in the air fryer. If you do use chicken breasts, make sure to pound them to an even thickness to ensure even cooking.
- Can I use regular breadcrumbs instead of panko?: Panko breadcrumbs provide the best texture and crunch. Regular breadcrumbs will work in a pinch, but the result won’t be as crispy.
- Do I need to preheat my air fryer?: Yes, preheating the air fryer ensures even cooking and helps the chicken crisp up beautifully.
- Can I make this recipe ahead of time?: You can prepare the chicken up to the point of air frying and store it in the refrigerator for up to 24 hours. Air fry just before serving for the best results.
- What if I don’t have an air fryer?: You can bake the chicken in the oven at 400°F (200°C) for 20–25 minutes, or until cooked through and golden brown.
Serving Suggestions: Completing the Meal
These crispy air fryer panko chicken thighs are incredibly versatile and pair well with a variety of sides. Here are a few of my favorite serving suggestions:
- Classic Sides: Serve with mashed potatoes, roasted vegetables, or a simple salad for a complete and satisfying meal.
- Lemon Butter Pasta: Toss cooked pasta with a lemon butter sauce and serve alongside the chicken for an Italian-inspired feast.
- Sandwiches: Use the chicken thighs to make delicious sandwiches or sliders with your favorite toppings.
- Salads: Slice the chicken and add it to a salad for a protein-packed lunch or dinner.
- Dipping Sauces: Offer a variety of dipping sauces, such as ranch dressing, honey mustard, or BBQ sauce, for added flavor.
And there you have it, my dears! A simple, flavorful, and utterly delicious recipe for Crispy Air Fryer Panko Chicken Thighs. I hope you enjoy making this as much as I do. Remember, cooking is an act of love, so pour your heart into it, and the results will be amazing! From my kitchen to yours, with love!

Crispy Air Fryer Panko Chicken Thighs
Ingredients
Method
- Step 1: Prep the Chicken: Pat the chicken thighs dry with paper towels.
- Step 2: Season the Flour: Combine the flour, garlic powder, paprika, salt, and pepper in a shallow bowl.
- Step 3: Dredge the Chicken: Coat each chicken thigh in flour, then egg, and finally panko.
- Step 4: Preheat and Prep the Air Fryer: Preheat air fryer to 400°F (200°C). Spray the basket with olive oil.
- Step 5: Air Fry the Chicken: Place chicken in the air fryer, spray with oil, and cook at 400°F (200°C) for 10 minutes, flip, spray again, and cook for another 8–10 minutes.
- Step 6: Rest and Serve: Let the chicken rest for a couple of minutes before slicing or serving.
Notes
Loved this recipe? Save it to your favorite Pinterest board so you can easily find it later! ✨
